Recently I needed to replace my ironing broad canvas so I decided to take a few photos to show my ironing board and area. This surface is used primarily for pressing pieces of fabric and other fiber art materials…No garment ironing goes on in this studio!
The ironing board is 18” x 48” and is made of ½ “ OSB plywood with some reinforcing 1x1s, IKEA legs, cotton canvas, and very thin cotton batting. I’m not showing how we made the actually covered board (you can find great tutorials on YouTube).
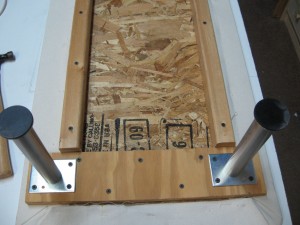
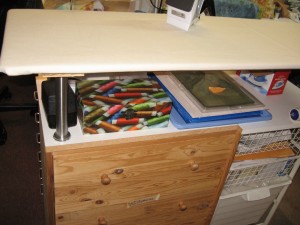
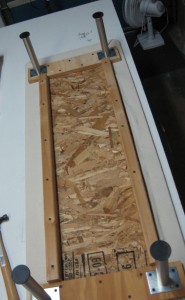
To save floor space and to make usable space under the board it is set on top of a small dresser (IKEA) and a wire basket unit (IKEA) that have been topped with a counter top surface. The height (about 37 1/2″) works well for me; I’m about 5’2”. The under side of the older board (photo #1) shows that, unfortunately, my Mister didn’t realize I would be recovering it, so he used wood glue (that suckers never coming off!) and screws to attach the leg boards on top of the canvas.
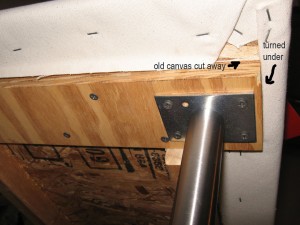
I simply cut the old canvas away and when replacing it folded the new canvas under (photo #3). The extra wood was use to make the board more sturdy, to keep it from warping (photo #2) and also, so longer screws could be used for attaching the legs.
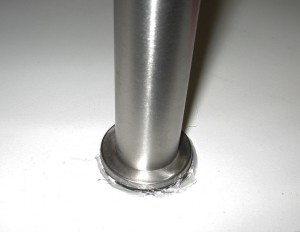
I positioned the board on the counter and applied a bead of hot glue on the counter top, around the base of each of the legs. This works great to keep the board in place without actually gluing it down (photo #4). It won’t slide but may be lifted off.
There is access to the under space from all four sides. On one side of the counter I have a couple of nails holding plastic rulers. The top wire basket contains hand quilting thread and hoops. The deep bottom plastic bin holds batting (photo #5).
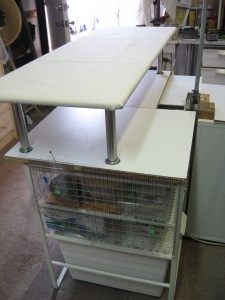
Here it is before things are placed under it (photo #6) and after (photo #7).
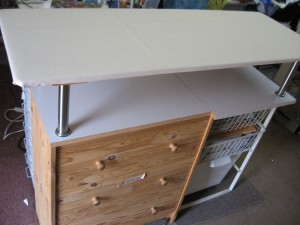
Photo #6
I hope this give you some useful ideas. Do you enjoy seeing the studio spaces of other artists?
Thanks for the great idea.
Thank you for the comment, Pauline.
Yes! I love looking at photos of other artists studio spaces. Thanks for sharing these photos.
Thanks for the comment. I love seeing others’ work/play spaces too!