Tag Archives: thread painting

First Responders and a Winner

Visions Art Museum had a Call for Entries with the theme First Responders. This exhibit will be online only and I haven’t heard yet if my piece has been selected, I’m sharing it here.

I had many ideas but I got a late start so I went with the simplest one. It’s only about 15″ square, which was doable for me even though I’m rusty. The first image I shared on my previous post, it is fused without the vessel. If you follow me on Instagram you may already know what the surprise vessel is.

The quilt sandwiched and the vessel being auditioned in this quick shot with poor lighting.

I had the idea of using a mask for the vase/vessel long before the main design. In making the vessel I discovered that a (too) hot iron would melt the mask more than I had anticipated. Thankfully, I had it sandwiched between parchment paper. I actually like the “aged” look it gave the mask. I removed one ear strap and used the other as the bottom edge and feet. I used embroidery floss with a close blanket stitch around it for a bit more interest.

I free motion quilted/thread played, echoing the flowers and greens, and wrote “Thank you First Responders.” The writing is subtle, I didn’t want it to be the first thing the viewer noticed. I quilted green in the center of the yellow flowers later.

I make tiny double layered binding with butted corners, it’s not fast but it is still my favorite way to finish any quilt. Knowing that my hand is not 100% yet I didn’t want to try to stitch through my usual painted fabric so I used a softer, thinner fabric (white muslin, I think) and painted two pieces.

Wet binding fabrics.

Another favorite thing is to “break” the binding where the quilt design has an obvious break – in this quilt it is between the table top and the main design. I got the fabric wet and used an old vinyl shower curtain under it. I laid and smoothed the fabric out and then painted it; one to contrast with the main area piece and the other to mostly match the wood-look table top. Then I crunched the wet fabrics lengthwise to give some added interest.

I rush dried this pieces, which means I let them be for a short time and then heat set before rinsing them out with water to remove any paint, then squeezed as much moisture out and ironed them completely dry. They really lightened up.

Dry and ready to be made into binding.

The vessel was stitched on after the binding was finished.

I always add side binding first then leave a one inch hang over on the top and bottom binding edges, which gets trimmed down. The already cut fabric pieces I painted were almost too short, so in this photo I was just checking by laying them in place… Machine stitched the side bindings first. I love those clips, they hold the binding for the hand stitching with no more pin stabs!

I’m please with the finished piece which I’ve titled – Mask for Them. The exhibit should be online beginning May 3, 2021, with or without my piece I’m sure it will be a great exhibit. VAM has wonderful online shows, events, and activities.

Thanks to those of you who entered for a chance to win the Painted Tree fabric… Congratulations to Karen G, you are the winner! Please email your mailing information.

I hope you’ll stop by again for more fiber/mixed media art and a May giveaway.

Special Exhibit!

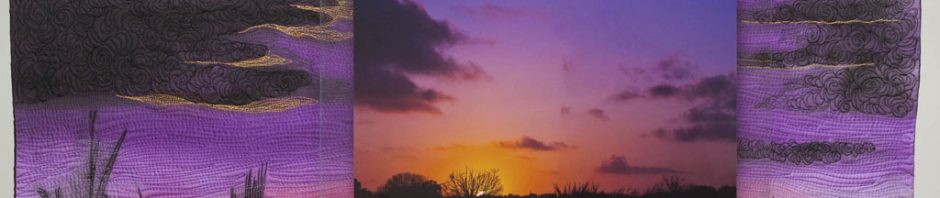
I’m happy to say that pieces from my Photograph on Fiber series will be one of the Special Exhibits at the 2016 San Diego Quilt Show. That link has all the information about the show.

If you don’t already know, these pieces began as a collaboration with my son whose photograph of a lone leaf inspired my fiber art. I figured out a way to incorporate the actual photograph and my fiber art quilt into one work of art. Some of the more recent pieces have been inspired by and include the work of other photographers (Always used with permission) and in one case* the photo was taken by me (*Gathering Evidence).

Trail

The original construction which included, in part; adhering the photograph to the acrylic sheet and drilling the holes, got to be too much for me. More recently I have had the photographs mounted to the acrylic and holes drilled professionally (a company I would highly recommend – ArtisanHD)

Sunset

Working on this series has allowed me to paint and stitch fabric & fiber and stretch as an artist and designer and of course, exhibit my artwork. I developed an easier version and teach that as a course online at Curious.com , where you’ll find more of my lessons, as well as lessons and courses on just about anything you may be curious about.

So if you are in the San Diego, California area August 31 – Sept 3, 2016, treat yourself to a colorful few days of quilts, fiber art, classes, and much more! I’m Chairperson for the Quilt Sales booth so stop by and say “Hi” and be wowed by the wonderful quilts.

Quilting Away,
A

Quilting Away

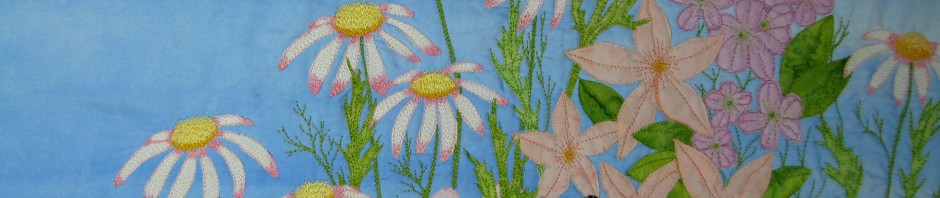
If you haven’t free-motion quilted or thread painted but wanted to, I encourage you to just jump in! I have had to get over a lot of hang ups because I came from the “hand quilting, perfect stitches, and needle turn applique” mindset. Working Playing with my Handi Quilter Sweet Sixteen machine and thread has been some of the most fun I have had in my fiber art career. But this can be done on a home sewing machine too!
garden quilt update detail 06 09

garden quilt detail 06 9

I’m so fortunate that I get to do this and call it “work!” I’m about to quilt the sky on this commissioned piece, after yards and yards of thread and many hours of free-motion quilting the flowers and foliage. Here are a couple detail photos… The sky and most of the flower fabric were painted by me and the butterfly (and birds which don’t show in these photos) will be a lesson I hope to be giving on Curious.com/fiberdesignsbyann in the future.