It’s interesting to me how time can seem to go by slowly and other times so quickly.
I was exciting to be trying some new things (for me anyway) on the gel print plate. I made one print and for some reason decided to clean my plate; nothing would work, I mean nothing! So after hours of trying I grabbed my sewing machine oil (I didn’t have baby oil), and first trying a wipe but later switched to a dish cloth, I was able to get it pretty much clean. I sure hope it still works when I try more.
Here is the print – Jacquard Textile Color on cheesecloth. For it being a quickie, I’m happy with it.
So time got away from me and I couldn’t print anymore, for now.
I’ll share a few more of my older quilts, apologies for some of the photo quality.
Simple Miniature Snowscape before it was quilted. I altered the water fabric with paint
Hand appliqued and quilted, with hand painted sky. On the design wall, bad photo.
When I look at that landscape now I wonder how the water could look like that when it was hand quilted. Maybe it just looks worse in the photo. If my hand quilting wasn’t up to my standards, I would un-quilt, I did it a lot.
Rose for a challenge, it had to include one of the purple fabrics (I think the one next to the darkest). I beached and over painted the petal edges. I really like the background.
Hand appliqued and quilted.
Made early on in my sky and water painting exploration.
Hand appliqued and quilted. That was great poppy fabric. Hand painted sky.
Remember watercolor quilts, I made a few. Machine pieced, hand quilted.
I feel fortunate that I starting making quilts long ago, I think really the best years. From traditional to modern and everything in-between I have had the best time exploring, learning, and finding more ways to play with fabric. I hope you enjoyed this little quilt show and if you have any questions please leave a comment, thanks.
I’ll be announcing another giveaway/sweepstakes soon, so I hope you’ll check back again. Stay Safe and quilt away!
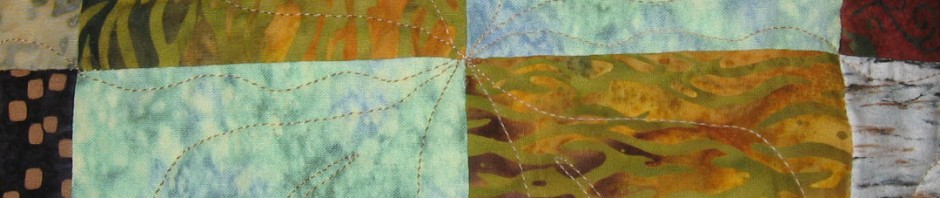
I hoped to have my roadrunner piece finished but between the designing, cutting, and next drying time, it’s going to take longer than I thought it would.
So, I’m sharing some pieces here, I’ve used different painting techniques on them. I’m sure I have shared some of them in the past but I think they are a nice reminder of what we can do when starting with white fabric. They could be done on printed fabric or painted fabric, again. I may not be completely sure what techniques I used on some but I’m sharing as much as I can remember.
Starting with the sweet one…
Chocolate Sauce and Wrappers. I pulled a thinned pint color, with a cheap brush, onto dry fabric and then wet the fabric and did a wash. The “chocolate sauce” was probably done with an eye dropper and then tilted. I hand painted little white highlights to give more dimension. The wrappers are metallic painted fusible in silver and gold.
Clothespin resist painted not dyed. I remember this being really fun to make!
I used the clothespin resist in this abstract that I then over painted. I remember starting to quilt it and not liking where I was going, so I think I put it away or maybe I cut it up! I probably should have just stretched it on a canvas.
Detail from Fallen…
For Fallen I used real leaves for stamps and a credit card for the lines. I think I used a pointed round paint brush for the dots. This was a fun one to quilt.
Fallen one from my Photograph on Fiber series.
Detail of Above Lake Cuyamaca…
In previous post I shared the how-to quilt and then paint the border. I painted the sky and water and I think the quilting worked well for the ripples in a lake.
Detail Drift and Flow…
Drift and Flow has wool batting. I quilted the heck out of this piece on my domestic sewing machine; the last piece I did before getting my sit-down quilting machine. I’m glad the quilting shows in the photo because the black thread on black fabric is difficult to see in person. The black and gray on the right (above) is pole wrapped (same piece as the larger on the left below), and I was thrilled with the results, particularly in the gray area. It looked like hanging leaves. The square (ish) pieces were made by throwing paint down while thinking of sciencey things. The curvy lines are satin stitched and the gold drips are metallic paint tilted to let run and then the piece was cut into four squares.
Dwell detail… Dwell is a painted wholecloth and my most favorite quilt, ever.
Dwell back, this is the quilting that runs the width of the lower back. Sadly, it doesn’t show on the front.
There are simple embroidered “steps” leading down from the silk.
The background fabric was stretched on a frame and painted. The windmills are made from a handmade stencil, the brick rectangles are purchased hand dyed silk, and the gold frames are painted fusible. The binding fabric was painted especially to continue the colors from the main cloth.
I hope you enjoyed this little quilt show and the these pieces have given you some ideas for techniques you may want to try.
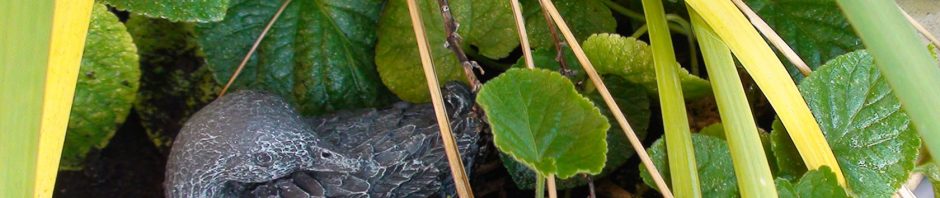
More fun findings… While going through my studio file cabinet I discovered photos and pieces from my miniature landscape class and earlier. The photos were from long ago, before digital photos, I sure wish I had better photos some of these pieces. I’m so happy for digital now!
I can see now every little thing that I would do differently in these pieces.
I like how this piece has a little waterfall step down. You may be able to tell that I used the back side of the fabric in that area of the water. Now I would add little rocks on the drop edge and foamy, splashy water around them. The border inset was a small floral fabric with the perfect colors. I like how the border turned out.
Private collection. I can’t remember the title and wasn’t keeping good enough records at the time.
These are from my early class demonstrations showing how one simple line pattern could look very different just by the use of different fabrics. The students always proved me right and I loved seeing what they came up with.
Same pattern, different place and time of day.
I found magazines too. Those two works are the same pattern that I used in my very first miniature landscape, which was published in Miniature Quilts Magazine in 1997. Do you remember that magazine? I guess it went out of business years ago.
Distant Clearing
Had to laugh – “…all of the fabrics available…” Nothing like the fabrics made today AND now I like mixing paint for my landscapes and more!
When he wasn’t working in jets and helicopters (for 37 years), my late dad was a woodworker, an artist, and a frame maker. He always supported me in my art. I remember struggling with the shore/water line in the piece below. He watched as I tried several pieces. These days I would just paint the perfect fabric. When I finally found a fabric that worked for me, he was as excited as I was, so I gifted the quilt to him AND…
… no surprise, he framed it. I never recommend putting quilts under glass unless the glass is spaced away from the fabric. This may have had glare-free glass, I can’t remember (and can’t tell from this shot). I don’t remember him asking how it should be treated, he just framed away.
The last thing I’ll share from the file cabinet dig was a manila folder containing this cut out landscape laying on a piece of felt. The plan would have been for a very narrow seam allowances tucked under, and I would hand applique them. I’m sure I was using it to demonstrate shadow and light and line and distance. As much as I like it I would change things now… For one thing, the light wall in the center distance would have narrower and closer together lines, tilting lower on the right. That would help push the wall back farther and add better direction. I do love the contrast BUT the foreground land and water should be darker still. Paint would do it!
This was just drawn after looking a many photos.
I’m beginning to think that opening that file cabinet was like opening Pandora’s box!
Reminder: June 14 is the deadline to enter for a chance to win a piece of hand painted fabric. Thanks to those of you commented to enter.
Also, I’m working on a piece for my upcoming Photos in Fiber/mixed media Art blog post (TBD) and have some wonderful pieces, made by others, to share.
We had a great quilt show but it wiped me out! It didn’t help that my cat was punishing me with 2am and 3am wake-up calls for not being around all week!
Many quilts sold, as well as, one pillow and a few bags of vintage patchwork blocks. The quilts that hung in the show were amazing and so creative and inspiring.
I never have time to take photos but I did snap a quick one of this beauty – Tree of Life, made by my friend Sue Atlas. It earned a 2nd place (not sure the category); the winners will be on the SDQS website in the near future. Sue’s quilt also won 1st place at AQS.
Now I’m pushing a deadline. Here are some parts of a mixed media piece I’m working on. The fingers here are clay but because of the weight I’m going to try and recreate them in paper clay. Also, I painted one eyeball on silk (wrapped around a round rock) but then figured they needed to be painted on a flat surface, so I’ll be painting two new ones.
With every new part for this project my family tells me – “That’s creepy.” But in the end I hope it won’t be too creepy! More to come.
Wild busy setting up my booth (Quilt Sales), with great helpers at the San Diego Quilt Show that will be open Thursday, Friday, and Saturday. We have over 129 quilts for sale… and one pillow! New and antique in most every style. We’ve already sold some quilts and we aren’t officially open!
We set up for two days before the show actually opens and as with every year I’m blown away by the fact that our membership is an all volunteer organization.
Set-up in progress
My Mister has helped with the show for years and this year he handled moving storage (with our son, who has also been sucked into the vortex for many years!) and driving the truck. It was a pretty big truck but looks tiny in the yet to be filled space!
On another subject – I’m happy to be scheduled to teach my leaf painting class once again at Visions Art Museum on October 5th… the perfect class to “fall” into!
I have much to post but making art keeps getting in the way!
I remember about ten or fifteen years ago getting rid of my hand embroidery materials/tools. When I was young I hand embroidered everything! But then I became a quilter and wouldn’t be creating hand embroidered piece anymore. Fast forward to 2017 and I was buying back all the tools I use back then. I think now that I primarily machine quilt I’m enjoying the comfort of the slow rhythm of hand embroidery once again.
After embroidering on a quilt (I’ll share in a future post) for the San Diego Quilt Show quilt challenge ; the theme being “Wild, Wild, West” I kept going and made this hat for the block challenge.I first draw the hat on paper, then scanned it into Adobe Illustrator, made it a vector and resized it. I applied white fabric to an 8.5″ x 11″ piece of freezer paper, pressed very well and sent it through my laser printer. I heat set it and hooped it up.
When the embroidery was finished I hand appliqued the underside and the entire hat this a pretty mottled “batik.” And to my surprise I won a Viewer’s Choice second place ribbon! I’m going to ask our historian for a photo of the exhibit; I believe there were fifteen hat block entries… I did a quick walk-by but was pretty busy and didn’t see most of the show and so didn’t take photos outside my booth.
Do you hand embroider? What floss do you used and do you wrap your hoop?
I’m recovering from the quilt show where we had near 400 quilts in the general display and over one hundred quilts for sale in our Quilt Sales booth. I had help from some awesome volunteers, members of SDQS (who are also volunteers!), and from my patient husband (who has helped me with this show for many years). Quilts were on the drapes, on the tables and on hangers… It was a lot of quilts! About a third of the quilts and a pillow in this booth sold.
Because the theme for this show was Wild, Wild West, I designed a turning display rack using chicken wire; my husband build it to display my “For Sale” artwork. Then our daughter said…”You have to put a chicken in there!” so… As with the quilts, SDQS receives a small percentage of any sales.
I’ll share some of my other items in future posts but for now here are my coiled fabric bottle cap magnets which are located on the metal circle on the chicken wire display . I had a bunch of fabric coils left from other coil projects and this was a good and fun way to use them!
I was pleasantly surprised to have won a second place ribbon for a piece I entered in the “Hat” block challenge. I’ll share that and my challenge quilt in the next post. Until then, quilt away!
Well, it has been a long time since I posted but here I am again. We recently made it through the 2017 San Diego Quilt Show (the 36th Annual) and what an inspiring show it was. I’m always amazed this show is put on by an all volunteer non-profit organization and I’m proud to be part of it. Of course, the people who enter their incredible quilts are to be thanks too. Here are a couple photos. I headed up the Quilt Sales booth again this year and with the help of a couple terrific members the booth looked great. I’m happy to say we sold over half of the quilts entered in our booth this year and a pillow! The show souvenir booth is on the opposite side of the sales booth and there we offer show year pins, tote bags, San Diego fabric and this year I was able to offer my felted soaps, glass patchwork (aka mosaic) items and hand painted fabric.
In foreground Quilt Sales booth ~ Photographer Cameron Scott
Quilt Sales booth from the floor. Photographer Cameron Scott