Tag Archives: stenciling

Surface Show

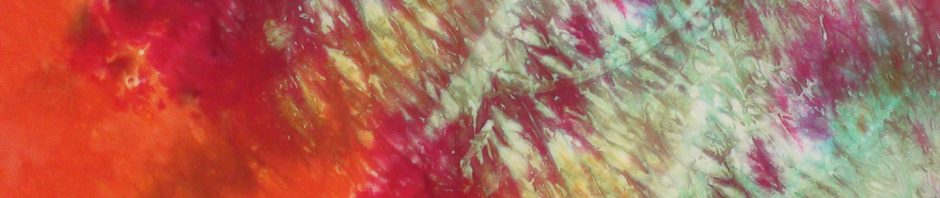
I hoped to have my roadrunner piece finished but between the designing, cutting, and next drying time, it’s going to take longer than I thought it would.

So, I’m sharing some pieces here, I’ve used different painting techniques on them. I’m sure I have shared some of them in the past but I think they are a nice reminder of what we can do when starting with white fabric. They could be done on printed fabric or painted fabric, again. I may not be completely sure what techniques I used on some but I’m sharing as much as I can remember.

Starting with the sweet one…

Chocolate Sauce and Wrappers. I pulled a thinned pint color, with a cheap brush, onto dry fabric and then wet the fabric and did a wash. The “chocolate sauce” was probably done with an eye dropper and then tilted. I hand painted little white highlights to give more dimension. The wrappers are metallic painted fusible in silver and gold.

Clothespin resist painted not dyed. I remember this being really fun to make!

I used the clothespin resist in this abstract that I then over painted. I remember starting to quilt it and not liking where I was going, so I think I put it away or maybe I cut it up! I probably should have just stretched it on a canvas.

Detail from Fallen

For Fallen I used real leaves for stamps and a credit card for the lines. I think I used a pointed round paint brush for the dots. This was a fun one to quilt.

Fallen one from my Photograph on Fiber series.

Detail of Above Lake Cuyamaca

In previous post I shared the how-to quilt and then paint the border. I painted the sky and water and I think the quilting worked well for the ripples in a lake.

Detail Drift and Flow

Drift and Flow has wool batting. I quilted the heck out of this piece on my domestic sewing machine; the last piece I did before getting my sit-down quilting machine. I’m glad the quilting shows in the photo because the black thread on black fabric is difficult to see in person. The black and gray on the right (above) is pole wrapped (same piece as the larger on the left below), and I was thrilled with the results, particularly in the gray area. It looked like hanging leaves. The square (ish) pieces were made by throwing paint down while thinking of sciencey things. The curvy lines are satin stitched and the gold drips are metallic paint tilted to let run and then the piece was cut into four squares.

Dwell detail… Dwell is a painted wholecloth and my most favorite quilt, ever.

Dwell back, this is the quilting that runs the width of the lower back. Sadly, it doesn’t show on the front.
There are simple embroidered “steps” leading down from the silk.

The background fabric was stretched on a frame and painted. The windmills are made from a handmade stencil, the brick rectangles are purchased hand dyed silk, and the gold frames are painted fusible. The binding fabric was painted especially to continue the colors from the main cloth.

I hope you enjoyed this little quilt show and the these pieces have given you some ideas for techniques you may want to try.

Painting Fabric Pinwheels

I rarely make patriotic art but I wanted to make pinwheels using fabric and paint and since the 4th of July is approaching this turned out to be one of those rare occasions.

I reached for the Terial Magic spray stabilizer. It worked great, making the fabric behave like paper. Here is the finished piece and the step I took to make the pinwheels…

I like how the pinwheels seem to be lifting the pot off the ground like a hot air balloon!

I started by treating white fabric with Terial Magic and cutting three inch squares.

Apply star stickers (I made these) to treated white fabric.
Use a sponge and acrylic paint, dab over the entire surface.
Let dry (it dries quickly) and remove stars (if the stars are still sticky save for other projects).
Cut a wavy line through card stock to make the stencil.
Flip the square over and use another color paint and a sponge to dab just to one side of the stencil (for a less formal stripe).
For a more formal stripe – after cutting a curvy line in the card stock, tape the two pieces together leaving a 1/4″ gap.
Once the piece is dry fold it in half diagonally, open out and fold the other direction corner to corner again.
Now cut from the outside corners to a little past half way up on each creased line.
Bring every other corner up to the center.
I apply a piece of tape to hold while I get the thread and needle ready.
Use a needle with a double length of thread and remove the tape.
Start on the back side in the center and push the needle and thread through to the front. I like to use a thimble to help push.
Catch each point in a clockwise fashion and pull thread tight. Stitch through to the back and come up again to secure.
Grab the button and stitch it on, then flip to the back and tie off the thread.
And we have made a pinwheel!

I can imagine these being painted for many occasions or used to decorate a room. They would be fun to make with kids and glue could be used instead of needle and thread.

If you make fabric pinwheels I love to see your creations!

Fabric and Gunpowder!

I really enjoy the blog …And Then We Set It On Fire… The contributors are individual fiber artists who work in and explore a multitude of surface design techniques and more; sometimes working together. I once had the pleasure of being a guest artist on FIRE!

One of their recent blog posts did more than catch my eye. My interest was really sparked when I read that Kelly Hendrickson and Wil Opio Oguta, the two artists posting on FIRE this month, had been exploring the use of GUNPOWDER on fabric!

I have tried many different techniques over the years, here are some…

shibori opening detail
Shibori pole wrapped straight, using Jacquard Textile Color paints
anns shibori painted
Shibori pole wrapped on diagonal using Jacquard Textile Color paints
tube shibori
Shibori rope wrapped using dye

stamping, dripping, splattering, flour resist, stencil made on the sewing machine; painted and stenciled onto fabric made on a plastic tarp, rubbings with wax pastels, painted cheesecloth, melted Lutradur, burnt silk, just painting, and lots and lots of hand painted sky and landscape fabric… but never gunpowder!

curving printing silk gelli
drip stamped3
flour paste a4
flour resist 3
machine made stencil painted
machine made stencil
melt lutradur burn silk
rubbing paint wax pastels
fabric painting rose
sky fab assort

Kelly and Wil have publish an e-book the explores their gunpowder techniques (I just bought it!), I hope you will visit “…And Then We Set It On Fire…” and each of their websites – I think you’ll have a blast!

Thanks to Kelly and Wil for letting me share their gunpowder post!