Tag Archives: how-to

Photo Paper Fabric

After I figured this out I noticed that other people online have used photograph printer paper in place of Yupo paper for watercolor and ink. I didn’t look to see if anyone was doing exactly what I am, which is to use acrylic paint (textile and regular) and print/paint fabric from it. When done well, I ended up with not only a piece of fabric but a piece of paper that could be used in other projects too.

I made several pieces that didn’t make it into my new videos (below). The camera was on for some of them but I’m not sure if I’ll ever edit and publish them. Anyway, it was a lot of fun and I could have painted fabric and paper for hours, just to see what would happen if…

Here are a few of the pieces.

The paint spreads on the fabric, depending on how heavily and thick it is applied to the paper.

I love the paper piece (below) from this flower piece more than the fabric. It could be stitched on, added to collage, or framed just as it is. There’s a lot that could be done with the fabric too… I think I’ll probably hand embroider on it.

I used different tools to get different outcomes. For the flower piece I used a tiny metal tip on the paint bottle and painted/printed the green. Then I used a dot tool and added first the violet color to the paper and printed/painted the fabric a second time. Then lifted it and added orange to the paper and laid the fabric on the paper for the last time.

This is the photo paper after the fabric had been lifted off.

These are just more exploring with different tools and layering. I used the tiny tip again, a mist bottle, a cheap bristle brush, an eyedropper, just poured from a little container, and of course, my fingers! I still need to heat set, maybe rinse, and press them.

I have two new videos, one shows how I painted the fabric using this technique, the other I showed in my previous post. Not my best videos but they do go through the How-to of it.

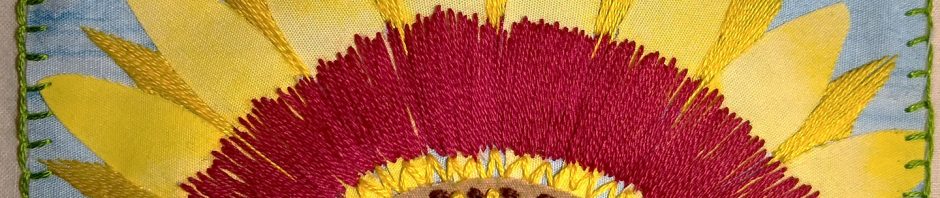
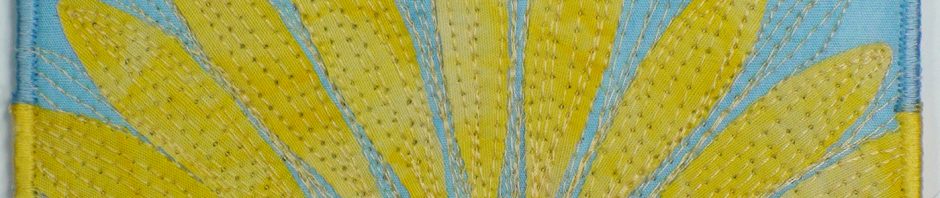
It Looks Like Watermelon to Me

I’ve put together two little fabric packets. One (#1) is white, blue, and red and the second (#2), what I’m calling watermelon/lavender, for the July giveaway/sweepstakes. Let me know which one (or either) you’d like a chance to win by following the rule instructions below.

Here’s the How-to video showing how I painted the watermelon colored fabrics that is in giveaway packet #2.

Fabric packet #1 The flower pieces are 13″x10″ and 15 1/2″x8 1/2″, the Arashi/Shibori is 22 1/2″x 17 1/2″
Fabric packet #2 Flower piece is 11 1/2″x16 1/2″, Lavender/crackle is11″x11 1/4″, Rope wrapped is 16″x12 1/2″

Sweepstakes/giveaway begins July 21, 2021 and ends at 9pm (Pacific Time) July 26, 2021.

To enter: You must live in the US only (no international entries). One entry per person. NOTE: (If applicable) If your name is drawn as the first winner it will be removed for the second drawing.

Leave a comment that you would like to win – #1 (white, blue, red) either/or #2 (watermelon/lavender) and include your first and last name (or last initial).

On July 27, 2021 I’ll use a random drawer and announce the winner/s on my next blog post. Winner/s will email me their mailing information and I will mail the ­­­­­­­­­­­­­­­­fabric packet ASAP. If I don’t hear from the winner within five days of drawing date, I will run another random draw. Good luck!

Painted Fabric and Giveaway

I’m excited to announce that next week I’ll be posting the Photograph and Fiber pieces. There is a little something for everyone – great ideas and, I think, they’re very inspiring.

I’ll be showing some of the fabrics I’ve been painting lately in futures posts but for now, here is the most recent sky painting video…

I’m happy so many of you entered for a chance to win a piece of hand painted fabric. And the Giveaway/Sweepstakes winners are –

Lynne K.

Chris W.

Christine B.

Naomi M.

Joy Q.

Please email your mailing info to me and I will mail the fabric ASAP.

If you make anything with the fabric I hope you will share photos, I’d love to see what you come up with.

Thanks for stopping by.

Easy Additions

In the past when I presented live lectures to quilt guilds, one of the talks was about making the quilt more our own. We often use one main fabric to help select the other fabrics in a quilt, this is a twist on that. During my recovery ironing is not happening so please excuse any wrinkles.

Here are some examples of commercial fabrics with easy additions.

Above is a pretty floral fabric and nice black on white. With the addition of a stamp the black/white becomes a coordinating fabric and there’s more to quilt around.

The stamp was made by cutting thin craft foam into leaf shapes and gluing them onto scraps of Lauan (Sometimes I use Masonite and even cut-up sturdy box cardboard for stamp base and handle). Then I scored down the center of the leaves for added interest. Next I placed the fabric on a slightly cushy surface. Using a makeup type sponge, I applied craft acrylic paint onto the leaves, then stamped the leaves onto the fabric.

Another floral fabric needed something more vibrant so I used my Sharpie Stained markers. So simple and fun. Notice on the right side, even the addition of just a few orange dots make this fabric more lively.

Sometimes the fabric combinations are unexpected.

Jacquard Textile Color in apple green and a paint brush made specifically for applying paint to fabric.

Here the gingham inspired the squares for the stamp which was made using a thick craft foam. The paint is Jacquard Textile Color in Fluorescent Yellow.

Another floral fabric and a three leaf stamp on gingham.

Below, this beautiful jewel tone design on black fabric has so much potential, both with coordinating and customizing. The blue coordinating fabric inspired this next stamp and I love the look on the polka-dot fabric.

The last and simplest idea… To softens the dark/jewel tone fabric I pulled in a cream floral and used craft acrylic paint and a new flat pencil eraser.

The orange dots added just enough kick of color to make the subtle fabric work better with the darker.

Hard to tell here but the color of the cream fabric actually is in the dark fabric.

As I revisit these pieces it really gets my creative juices flowing. I hope these examples sparked some ideas in you.

November Quickie

Previous post I shared the palm tree from the #Needlevember challenges; here is the free-motion video . I’ve had fun stitching everyday this month so far. It’s been a challenge first drawing something and then looking at it for reference while stitching on my machine. But I must admit the hand embroidery pieces have been a good speed (slow) for me at this time.

I’ve also produced a new video challenge project for Visions Art Museum member challenge titled: Fall Flag panel.

I hope you are staying safe and healthy.

As always, thanks for stopping by.

Fabric Postcards!

For those of you who will be in San Diego, I will be teaching a class on Thursday, June 29, 2017 at Rosie’s Calico Cupboard quilt shop. The class title is “How to Make a Fabric Postcard.” We’ll use commercial fabric to make a basic postcard card and we’ll play with some surface design techniques to make our own fabric for another postcard.

Class cost: $45

TIME:  9 AM to 4 PM

You will need to bring a sewing machine in working order and the know-how to operate it. The machine needs to be able to make a straight stitch, zig-zag and/or decorative stitches, and free-motion quilting (i.e. feed dogs drop (or covered) and darning/hopping foot)

Complete supply list will be emailed after confirmation of payment. Payment must be made via PayPal (PP account or credit card). NOTE: If the link doesn’t work it probably means the class is full. If you would like to be added to the waiting list for a future class, please email me.

Payment must be made by June 25, 2017. If for any reason you cannot attend the class I must be notified via email on or before June 26, 2017 in order to receive a refund. After June 26, no matter the reason, no refund will be given. I reserve the right to cancel the class due to illness or personal emergency. If I have to cancel the class you would receive a full refund (or the option to be added to a waiting list for a future class).

Though this class is not affiliated with San Diego Quilt Show, their theme this year is Postcards from San Diego.  If participating in the class encourages you to make and enter a fabric postcard in the challenge – that would be great!

Please feel free to contact me with any questions.

Fast and Fun Stencil

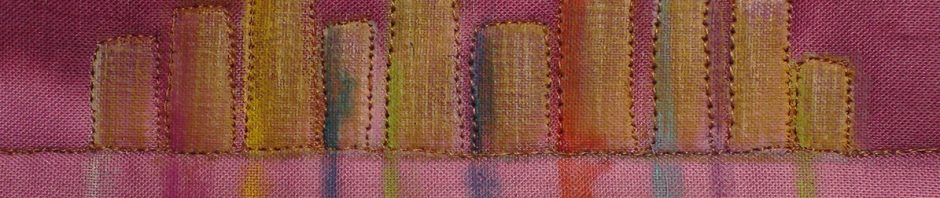
I figured out this very fast way to make and cut a stencil using my sewing machine.

Fast cut stencils and fabric prints

Then using textile or acrylic paints to make a print on fabric. Maybe you have a quilt with solid alternate blocks, this could be a fun way to add a bit more to those blocks and something more to quilt around. I hope you’ll watch the video and comment.

Fast cut stencils and fabric prints

Next I think I’ll try using these stencils ( and the pieces that are removed) on my Gelli Arts Print Plate!